So, choose WordPress as your blogging platform. Excellent! Starting your own WordPress Blog gets simple after knowing basics like what you need and how you can do it. Even if you are a beginner, who doesn’t have much idea about HTML, CSS, or web designing, you can create a professional blog with the proper guidance and using the correct tools.
Whether you want to start your blog as a hobby or for earning money, choosing a blog topic is important. Select a topic that you are interested in or you are an expert in it. As you pick an interesting topic, you won’t get bored in writing the quality content which helps your blog to grow.
Once you choose your blog topic, you can start creating your own blog by following the steps given below:
What do you need to create a WordPress blog?
WordPress platform has many benefits: it is free, it offers a vast range of selection of themes, designs, plugins, and add-ons and you can even earn money from your blog.
The things you need to create a WordPress blog are:
- A domain name for your blog (eg. myblog.com)
- Web hosting
- Installing WordPress
Follow the step-by-step guide below and you can start your blog in 30 minutes.
1. Setup
When you want to start a WordPress blog, use WordPress.org. About 95% of users use this self-hosted WordPress. WordPress is the most popular platform used by many successful bloggers.
Now you need a domain name and web hosting. The domain name is the address of your website on the internet, eg. www.myblog.com.
Web hosting is a home place for your website on the internet. To keep your website alive on the internet you need web hosting.
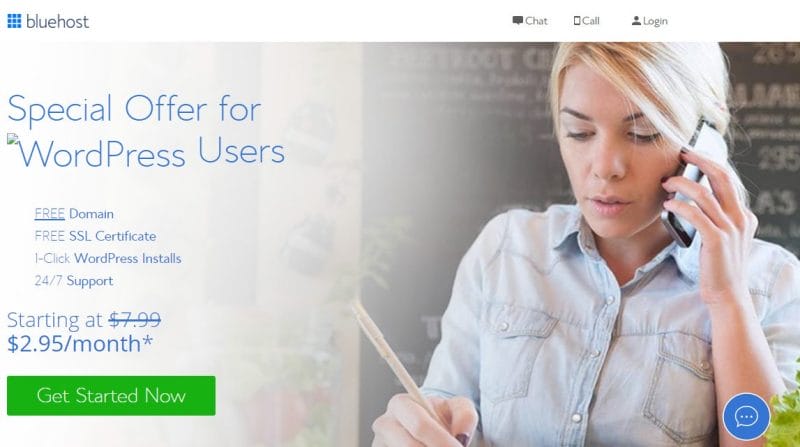
When you think about WordPress hosting, go for Bluehost. Bluehost is the official hosting partner recommended by WordPress. Bluehost offers free domain name registration for WordPress websites & blogs and its hosting cost start from $2.95/month.
How to buy a domain & web hosting with Bluehost?
Open www.Bluehost.com in a browser for free domain and web hosting. You will see the homepage of the Bluehost, click on the ‘Get Started Now’ button.
This will launch a pricing page, in which 3 types of plans are available. Basic, Plus, and Choice Plus.
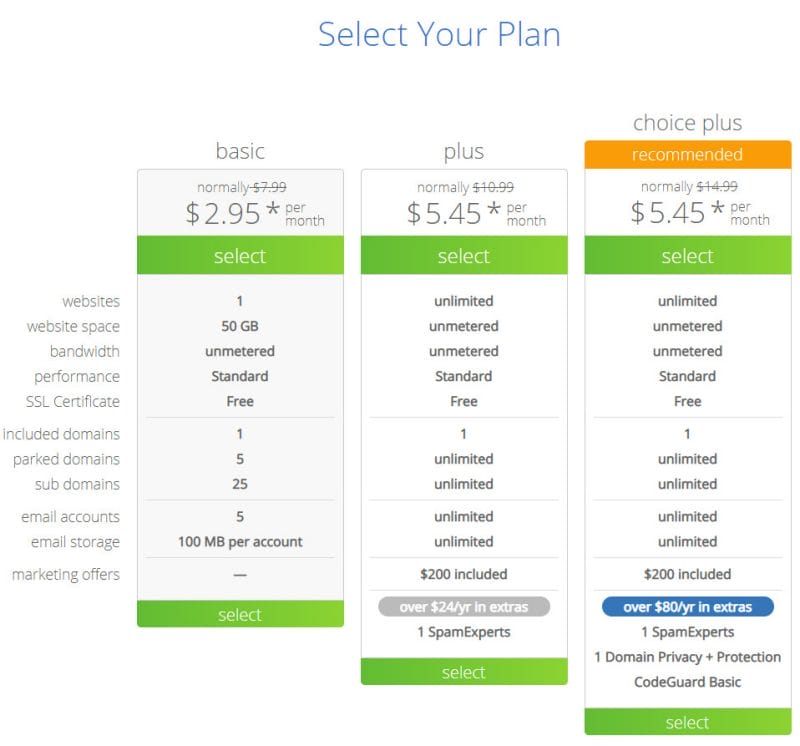
If you are a beginner, it is better to go with the Basic plan. Afterward, you can upgrade your plan.
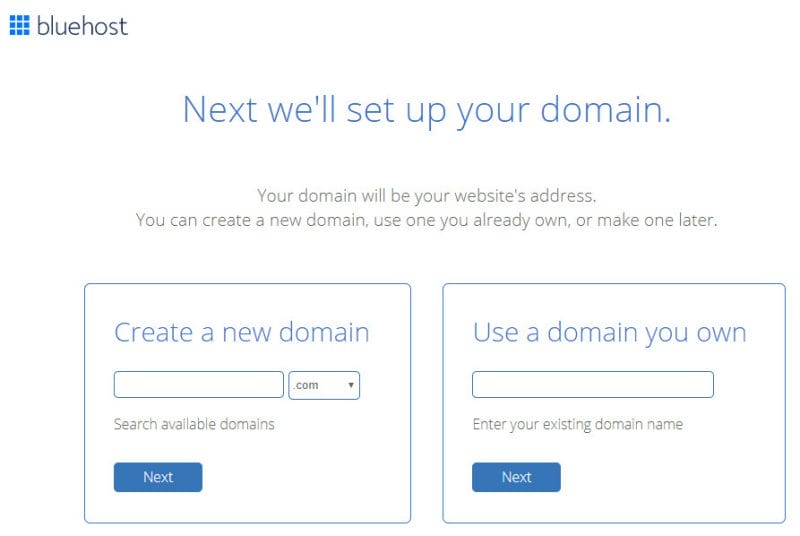
Once you ‘select’ your plan, you will be on the domain sign-up page. Here you can get a new domain by checking availability or if you have a domain already, then enter your domain name and continue, click on the ‘next’ button.
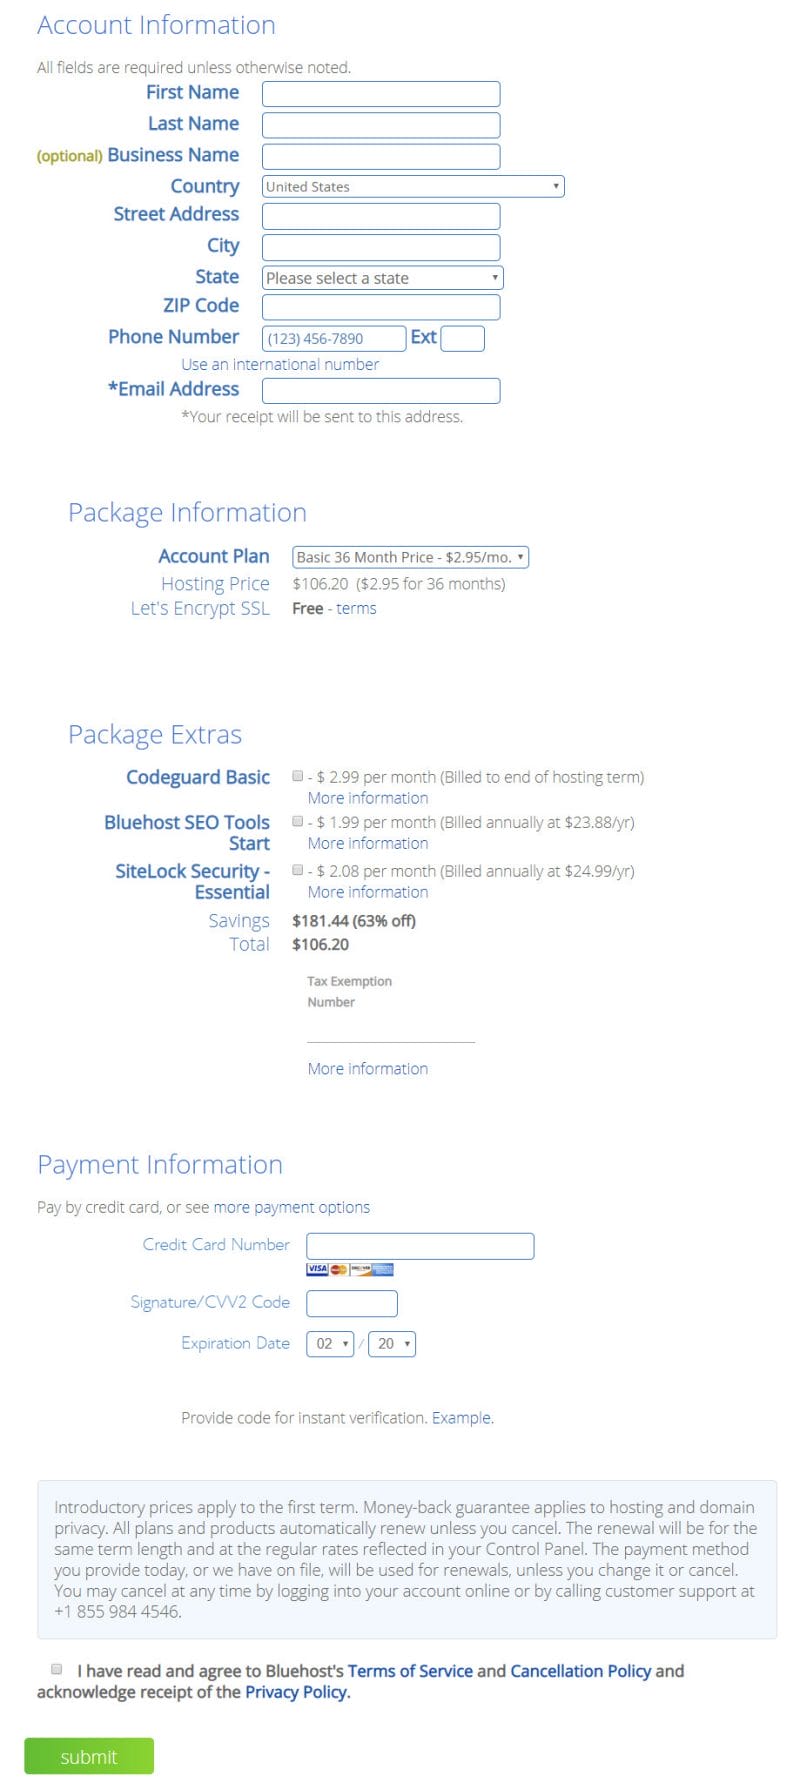
Now, you need to fill in your personal information and select a package. Also, select options for Package Extras (if you want to).
And finally, add your payment information, right check the box to agree to terms and conditions, and click on the ‘Submit’ button to finish.
You’ll receive an email having details of how to log in to your web hosting control panel aka cPanel. This is a dashboard from where you’ll install WordPress.
2. Installing WordPress
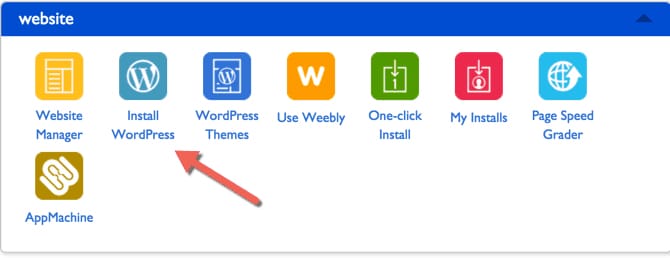
Now you need to install WordPress, use the login details received in the email, and log in to your Bluehost account. Once you logged in, in cPanel click on the WordPress icon in the website section.
Click on the ‘Get Started’ button to continue that you will see in Bluehost Marketplace Quick Install screen for WordPress.
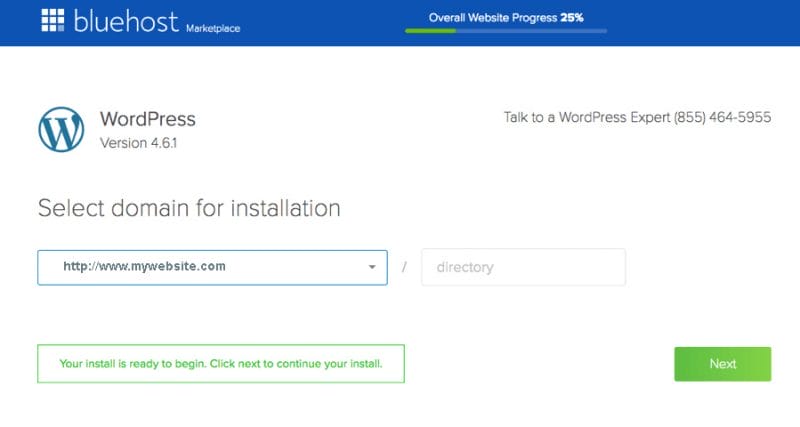
On the next screen, select the domain name where you want to install WordPress. Click on the ‘Next’ button.
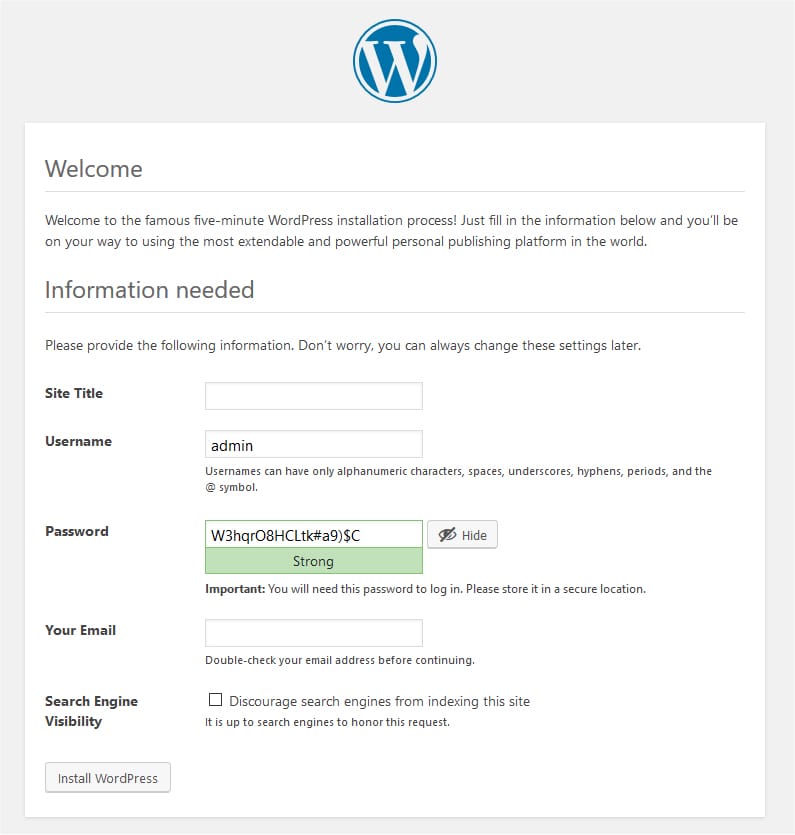
Enter your domain name, admin username, and password. Check all the checkboxes and then click the ‘Install’ button to continue.
After installation is over, you’ll see the ‘Installation complete’ message in the top header.
Now you can go to the WordPress login page. Your login URL will be http://www.myblog.com/wp-admin. Enter the username and password to log in to your WordPress blog and start blogging.
3. Select A Theme For Your WordPress Blog
A blog should be visually attractive which can be done with the help of WordPress themes. There are many free and paid themes available on the official directory at WordPress.org.
All themes are mainly responsive and have various appealing features that can impress the readers. Depending on your blog topic you can choose a theme from a whole collection.
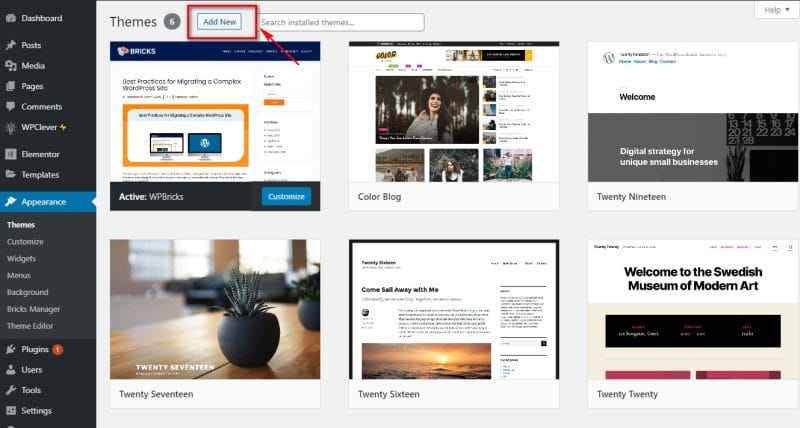
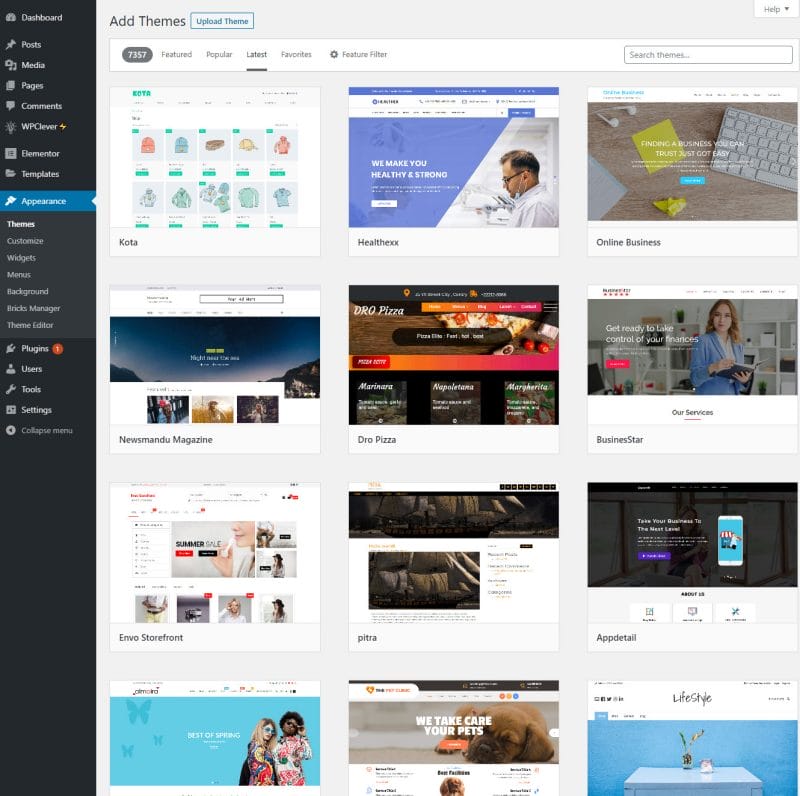
Go to Appearance > Themes, then click on the ‘Add New’ button.
You will find a collection of themes. You can also browse themes using filter options like featured, popular and latest.
If you already know the name of the theme, use the search bar, enter the name of the theme, and have a look.
Use the ‘preview’ button to view the theme.
One tip, select the theme in which your blog content is clearly visible. You need to highlight your blog content, so keep the design simple and clear.
When you finalize a theme, click on the ‘Install’ button.
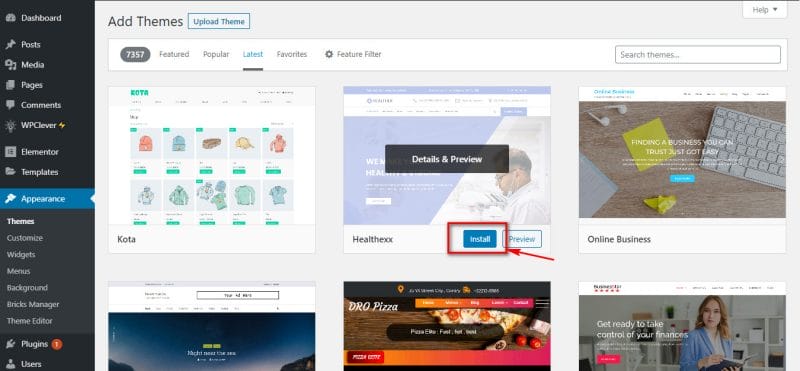
After a few seconds, the ‘activate’ button will appear. Click on it and you are ready to use that theme on your blog.
If you are not satisfied with the theme then you can also change your current theme later on.
You can customize the theme as per your choice by changing various features in a customization page. Go to Appearance > Customize.
4. Start Creating Your First Blog
WordPress has in-built blogging tools which help you to publish articles regularly. It is called posts. Blogs of your website can be added from Posts > Add new.
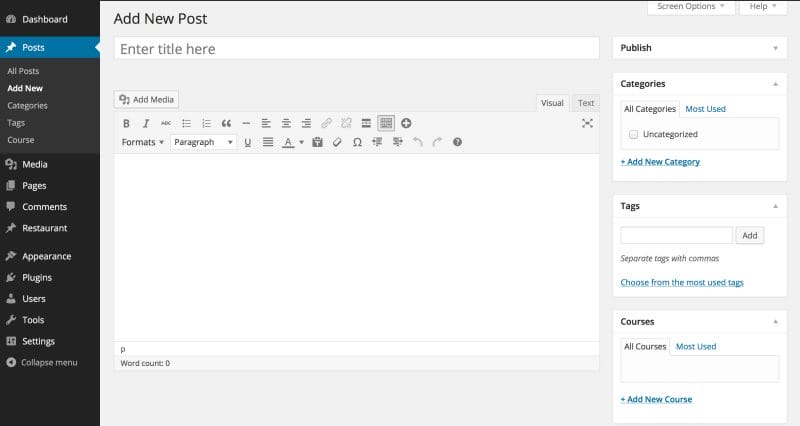
In the top text bar, you will enter the title of the blog. In the below text editor section you will write the content of the blog. You can even add images, video, and audio using the ‘Add Media’ button.
A featured image of the blog can be added from the ‘Featured Image’ tab, available at the bottom right.
You should also use categories and tags. It will be easier for readers to browse your website later on when you have many posts on your blog. Categories are for the broad grouping of the posts. It helps to identify what your blog is really about. Tags are the words that outline details of your posts.
Once you finish with your content, click on the ‘Publish’ button and your blog will be published on the internet.
5. WordPress Plugins & Customizations
To add additional features like a contact form or photo gallery, you need to use plugins. WordPress plugins work like apps that allow you to add new features to your blog without any coding.
Plugins allow you to add more essential functionality like:
Contact Form
Users can directly interact with you through a contact form. You need a plugin to add a contact form to your blog as WordPress does not have an in-built contact form. To add a contact form you should use the WPForms plugin.
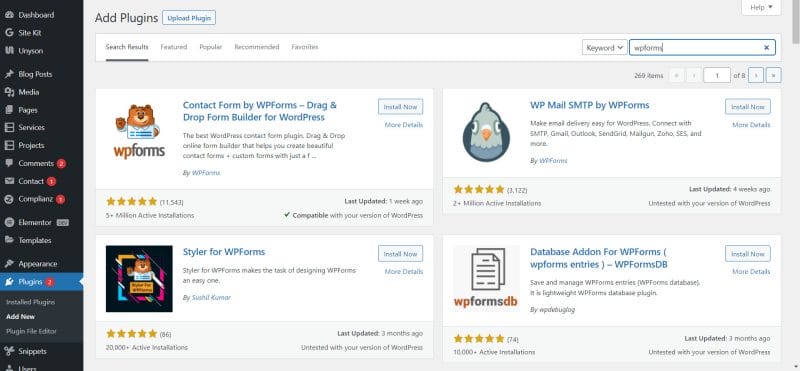
In the dashboard, go to Plugins > Add New. Enter the WPForms in the search field which you want, and then select ‘Contact Form by WPForms’, click on “Install” and “Activate.”
After the plugin is installed, go to WPForms > Add New, to create your first contact form.
This will open the WPForms dashboard. Enter a name for your contact form and then select the ‘Blank Form’ template.
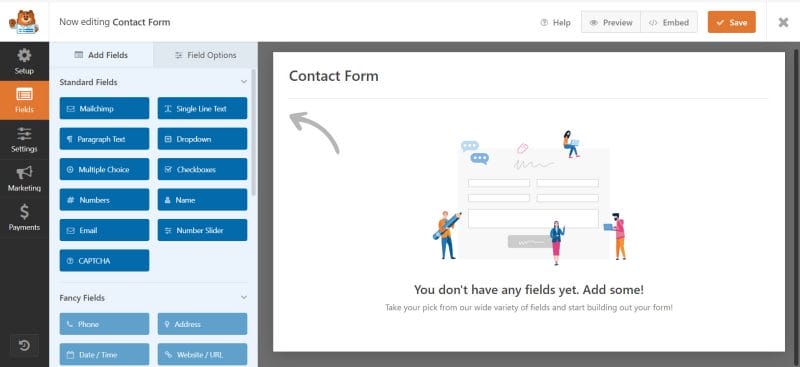
Now, to create a simple contact form you need to add new fields from the left column.
And when you finish your contact form, click on the ‘Save’ button at the top.
Now create a new page from, Pages > Add New and add the title ‘Contact’. Click the button ‘Add Forms’, below the title bar. A shortcode of your contact form will be added to the content editor area. Now ‘Save’ and see the preview. A contact form is added to the page.
You can add a few contents to the contact page. When you are done, click ‘Publish’.
Setup Google Analytics Tracking
MonsterInsights is the easiest and most powerful Google Analytics plugin for WordPress. Google Analytics helps you to see how your site is performing and track how many people visit your site. Installing Google Analytics helps you to see how much your blog has grown.
Firstly visit the Google Analytics website and sign in with your Gmail account. After that, you will sign up for a free Google Analytics account.
You will fill in all the information and your website URL, then you will be given your Google Analytics tracking code. Now we will use the plugin that automatically adds this tracking code to your blog.
Open the WordPress admin panel, install the MonsterInsights plugin, activate it, and on the menu go to Insights > Settings. It will open the MonsterInsights settings page. Click on the ‘Connect MonsterInsights’ button and it will connect Google Analytics to your WordPress blog.
Complete the setup. After that, go to Insights > Reports, to see the report of your WordPress blog.
Optimize Your WordPress Blog for SEO
To get more traffic to your blog, it is important to optimize your blog for SEO. It helps to rank your blog in search engines and users can easily find it. This is possible with the Yoast SEO plugin. This plugin helps you to optimize your blog.
Install and activate this plugin. In the menu, go to SEO > General. It will open the settings page.
You can complete the setup with the help of a quick configuration wizard.
More WordPress Plugins
Around 50,000 free plugins are available in WordPress which enhances the performance and functionality of your blog. Some examples of free plugins:
- UpdraftPlus – it helps you to create regular backups of your blog.
- Sucuri Security – improves the security of your site.
- WP Super Cache – speed up WordPress blog.
- Envira Gallery Lite – to add beautiful photo galleries.
Design & Customization
You can use either Beaver Builder or Divi page builder which helps you to customize homepage design, custom landing pages, or custom themes, without writing any code.
6. Earning Money From Your Blog
After creating your blog, you can even monetize your blog. There are many different ways to earn money from your Blog.
Google AdSense
If you want to earn money through blogging, then the first option you will think of is an advertisement. This is possible with Google AdSense.
You need to add a script from Google to your website to display ads. These are called CPC (cost per click) ads, in which you will be paid for each click a visitor makes on the ad. The cost is set by an advertiser.
Affiliate Marketing
Affiliate marketing is a great method for earning money as you can promote as many products as you can.
You will put a special link to sell a product or service in your blog content and you will get a referral commission, if anyone buys that, after clicking on your link.
If you are going for affiliate marketing, you must list the products that can catch the interest of your readers. Many popular stores provide an affiliate program to promote their products, for which you need to sign up for the store.
An Online Store With WooCommerce
WordPress makes it easier to create a shop online using the free WooCommerce plugin, which is one of the best ways to earn money.
Selling products through an online store can give you a rewarding experience as buyers are happy to have the products of their choice without much hassle.
You can add reviews and recommendations which builds the credibility of your store and selling products on your store will be even easier.
Frequently Asked Questions (FAQs)
Yes. Many blogging sites come with the option of paid and free services. Depending on your choice it is important to choose the right blogging platform which is useful to your blog. All blogging platforms have their pros and cons. So choose wisely considering which services you and your blog need. But WordPress is the most popular blogging platform. It is free and provides some additional customization features.
2. Can I build a blog without hosting?
No. Web hosting is a home place for your blog on the internet. To keep your website or blog alive on the internet you need web hosting.
3. How can I create a blog and remain anonymous?
To remain anonymous on your public blog you must turn on WHOIS privacy for your domain. You can have a fictitious name to write under your blog, just like many authors use. Also do not upload or post any of your pictures on your blog.
4. Can I build a blog in my own language?
Yes. You can. WordPress comes with 56 languages that are fully translated and many other languages that are partially translated. In the WordPress admin panel, go to the Settings page and choose the language or you can even select a language during installation. Also, you can select themes and plugins in the selected language.
5. Can I design a blog with no coding skills?
Of course yes. You do not have to learn any designing or coding to build a WordPress blog. You can have a professional-looking blog with the help of WordPress themes. Many themes provide drag & drop design options, that help you to customize your blog. You need to drag and drop the items into your blog page and the design will be ready.
Conclusion
Now you are ready to set up your own blog by following the above steps and it could take around 15 minutes. You will surely enjoy the journey of blogging through WordPress.